


The experience of any trailer owner or operator will tell you how easily things can go awry when maintenance is put on the back burner. A small crack in the flooring, or worn-out brake pads or a faulty hitch, can become a costly breakdown, and not at the best time. This is why it’s not only a smart idea to have a mobile trailer repair checklist, it’s a must.
From cross-country freight transport to mobile kitchen trailers and all the way to utility trailers, regular maintenance ensures you always have the equipment on the road and you don’t end up losing a lot of money. Let’s go over this checklist and master these steps so that you can avoid damage and stay ahead of it.
Why a Mobile Trailer Repair Checklist Matters?
Think of your trailer like your home. You wouldn’t ignore a leaking roof or broken door hinge for months — the same logic applies here. A structured maintenance routine helps you:
- Catch problems early before they become expensive repairs
- Extend the lifespan of your trailer significantly
- Stay compliant with road safety regulations
- Reduce unexpected downtime on the job
Professional mobile trailer repair services will tell you the same thing — prevention is always cheaper than the cure. So grab a notepad, and let’s get into it.
Step 1: Start with the Frame and Structural Inspection
The frame is the backbone of your trailer. Before anything else, get down low and give it a thorough visual inspection. You’re looking for rust spots, cracks, bends, or any signs of metal fatigue.
Pay special attention to:
- Weld points and joints — these are stress zones
- Cross members underneath the trailer bed
- Tongue and coupler area for any warping or damage
- Rust buildup, especially around bolted connections
If you spot surface rust, treat it immediately with a rust converter and protective coating. Deep cracks or structural bends? That’s a job for a qualified mobile trailer repair technician, not a weekend DIY fix.
Step 2: Check the Tires and Wheels

Tires are one of the most overlooked parts of trailer maintenance tips, yet they’re the first thing that fails on the road. A blowout on a loaded trailer is dangerous for everyone around you.
Here’s what to check:
- Tire pressure — Always inflate to the manufacturer’s recommended PSI. Under-inflation causes blowouts; over-inflation causes uneven wear.
- Tread depth — Use a tread depth gauge. Anything below 2/32 of an inch is unsafe.
- Sidewall cracks or bulges — These are signs of structural weakness inside the tire.
- Wheel lug nuts — Re-torque them to spec, especially after any recent travel.
- Wheel bearings — Jack up each wheel and try to wiggle it. Any movement or grinding noise means the bearings need attention.
Tires should be replaced every 3–5 years regardless of tread depth, as rubber degrades over time even when not in use.
Step 3: Inspect the Braking System
Brake failure on a trailer is not something you want to experience. Trailer brakes — whether electric or hydraulic — need regular inspection as part of any responsible mobile trailer maintenance routine.
Check the following:
- Brake pads and shoes for wear
- Brake fluid levels (hydraulic systems)
- Electric brake magnets and wiring connections
- Brake controller response — test it before every long haul
- Breakaway battery — this is the emergency backup system that activates brakes if the trailer separates from the tow vehicle
If your electric brakes feel sluggish or unresponsive, don’t delay. Contact a mobile trailer repair service to get them tested and adjusted before your next trip.
Step 4: Lighting and Electrical System Check
Faulty trailer lights are one of the most common reasons trailers get pulled over — and also one of the easiest things to fix. Walk around the trailer and test every single light before each trip.
Your checklist here includes:
- Brake lights and tail lights
- Turn signals (left and right)
- Marker lights and clearance lights
- Reverse lights
- Internal lighting (especially for mobile kitchen trailer repair setups or enclosed trailers)
Check all wiring harnesses for fraying, corrosion, or exposed wires. Trailer connectors can corrode over time — clean them with an electrical contact spray and make sure they’re seating fully into the tow vehicle’s plug.
Step 5: Hitch, Coupler and Safety Chain Inspection
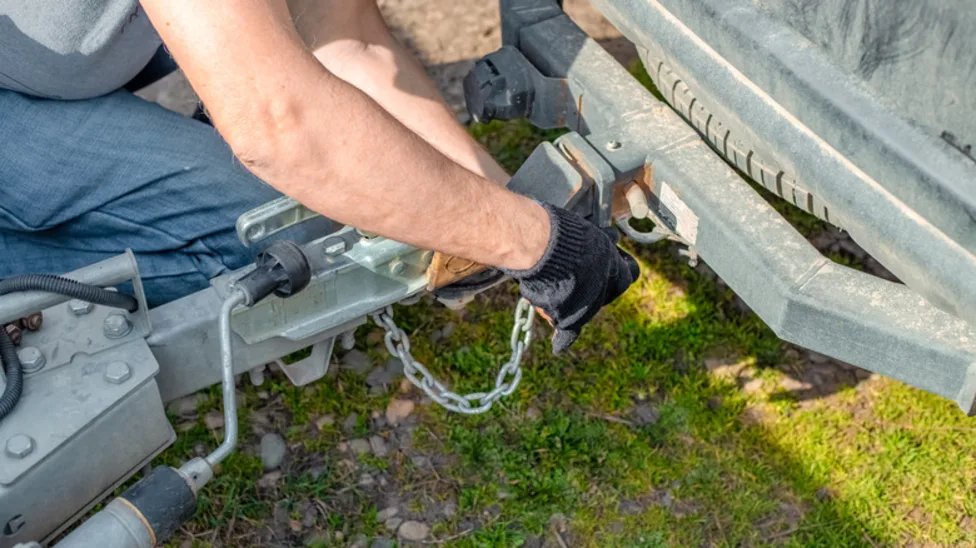
This is your connection point between the trailer and the road. Any failure here, and you’ve got a runaway trailer situation. Don’t skip this step.
- Inspect the coupler latch — it should snap firmly and not wiggle once locked
- Check the ball mount for wear or cracking
- Test safety chains — they should be crossed underneath and tight enough to not drag, but with enough slack for turns
- Inspect the jack and landing gear for smooth operation
- Look at all pivot points for lubrication needs
A well-maintained hitch is a quiet hitch. If anything rattles, binds, or looks worn down, it’s time to call in a mobile trailer repair professional.
Step 6: Flooring, Walls and Roof Inspection
This step matters a lot for enclosed trailers, cargo trailers, and especially mobile kitchen trailer repair situations where water intrusion can destroy expensive equipment inside.
- Walk the entire floor and press down firmly — soft spots mean rot or delamination
- Inspect all seams on the roof for cracking sealant or separation
- Check walls for dents, holes, or signs of moisture entry
- Look around vents, windows, and doors for failed weatherstripping
- Reseal any gaps with appropriate trailer-grade caulk or sealant
For mobile kitchen trailers, also inspect the ventilation system, LP gas connections, and any built-in equipment mounts at this stage. Any structural repairs here should be handled by experienced trailer repair services familiar with specialty rigs.
Step 7: Lubrication and Moving Parts
This is one of those maintenance steps people skip because it doesn’t seem urgent — until a seized jack or stuck ramp door wastes 30 minutes on a jobsite.
Apply grease or lubricant to:
- Hitch ball and coupler
- Landing gear gears and threads
- Door hinges and ramp hinges
- Slide-out mechanisms (if applicable)
- Leaf spring shackles and bushings
Use the right product — white lithium grease works well for metal-on-metal contact points, while silicone spray is better for rubber seals and weatherstripping.
Step 8: Document Everything
After completing your inspection, write it all down. Create a simple log that tracks:
- Date of inspection
- Items checked
- Issues found
- Repairs made or scheduled
- Mileage or hours at time of inspection
This documentation becomes invaluable if you’re managing multiple trailers, need to show maintenance history for insurance purposes, or want to know how to repair a trailer systematically over time rather than guessing what’s been done and what hasn’t.
How Often Should You Do This?

As a general rule for mobile trailer maintenance:
- Before every trip — Lights, tires, hitch, and brakes (quick visual)
- Monthly — Full walkthrough inspection
- Every 3–6 months — Lubrication, brake adjustment, bearing repack
- Annually — Full professional inspection by certified mobile trailer repair services
High-use trailers — especially those used in commercial settings — may need more frequent attention. If you’re running a food trailer or mobile kitchen, treat it like a commercial vehicle and schedule quarterly professional check-ins.
Final Thoughts
Staying on top of your trailer’s health doesn’t have to be stressful or time-consuming. With this checklist in hand, you can walk through the entire trailer in under an hour and know exactly where things stand. The cost of regular mobile trailer repair maintenance is a fraction of what an emergency breakdown, road accident, or full component replacement will run you.
Whether you choose to handle routine checks yourself or call in professional trailer repair services for the technical stuff, the important thing is that it gets done — consistently. Your trailer works hard for you. A little attention goes a long way in making sure it keeps doing exactly that.
FAQs
Q1. How much does mobile trailer repair typically cost?
Costs vary by repair type. Minor fixes like lights or seals range from $50–$200. Brake or structural repairs can run $300–$1,000+. Getting a mobile technician on-site may include a service call fee.
Q2. How to perform a trailer maintenance or hire a professional?
Simple tasks such as checking tire pressure, lights and lubrication are DIY friendly. But a certified mobile trailer repair technician is the one who would best be able to take care of brake systems, structural repairs, and electrical faults.
Q3. When should I have my trailer brakes repaired?
These are grinding noise, a brake controller warning light, pulling to one side or delayed stopping. If your breakaway system has not been recently tested, get it checked by a trailer repair service right away!
Q4. What is the most common cause of trailer breakdowns on the road?
The most common causes are tire blow outs and failure of the wheel bearings. They can be avoided with routine mobile trailer maintenance inspections prior to and during long travel.
Q5. How many times does a mobile kitchen trailer need a professional inspection?
Mobile Kitchen Trailers require inspections at least every 3 months because of heavy use, heat exposure and LP Gas systems. An expert of mobile kitchen trailer repairs will assess structure, gas lines, ventilation, and electrical systems.
Leave a Reply