

So you’ve decided to take your food business on the road, or are scaling up your catering operation, launching a pop-up concept, or are just tired of paying sky-high commercial kitchen rental fees. Whatever your reason, a mobile kitchen trailer can genuinely change the game for you. But here’s the thing: not all mobile kitchen trailers are built the same. Walk into this purchase blind, and you could easily end up with a rig that’s underpowered, undersized, or just plain wrong for how you actually cook.
That’s exactly why we put this guide together. We’re going to walk you through the top 10 features you absolutely need to evaluate before you sign anything or hand over a deposit. These aren’t vague tips – they’re the specific, practical details that separate a kitchen trailer that works hard for you from one that becomes a daily headache.
Let’s get into it.
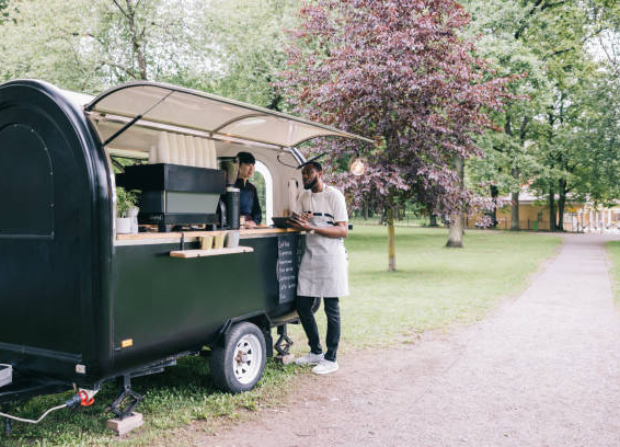
1. Kitchen Layout and Workspace Design
The first thing you should look at – before anything else – is the layout. People underestimate how much the floor plan affects daily operations.
Ask yourself: Can two people move around in here without bumping into each other? Where does the food prep flow from start to finish? Are the cooking stations, prep surfaces, and service windows positioned in a logical sequence?
A great mobile kitchen trailer puts the workflow first. You want cold storage near your prep area, your cooking equipment close to the service window, and your handwashing and sanitation stations positioned where health codes require them – usually within easy reach of any food-handling surface.
Look for stainless steel work surfaces throughout. They’re durable, easy to sanitise, and meet health department standards in virtually every jurisdiction. Also, pay attention to the ceiling height. A trailer where you’re hunching over your station is going to wear you out fast, especially during long service hours. Look for a minimum interior height of around 78 to 84 inches.
Slide-out extensions and fold-down prep surfaces are a nice bonus if you need extra workspace during setup, but make sure they’re built solidly – flimsy add-ons break quickly in high-volume environments.
2. Cooking Equipment Quality and Configuration
The cooking equipment is the heart of your trailer, so treat it that way when you’re evaluating your options.
Start with the range and oven setup. Commercial-grade burners matter – you want cast iron grates, solid knobs, and consistent BTU output across all burners. Don’t settle for residential-grade appliances dressed up in a commercial kitchen shell. They wear out faster and often can’t handle the sustained heat demands of real food service.
Think carefully about your menu before you decide what cooking configuration you need. A burger operation needs a flat-top griddle. A taco truck needs multiple burners for proteins, salsas, and warming. A BBQ caterer needs a smoker or at minimum a high-capacity oven. Some trailer builders offer custom configurations – take advantage of that if your menu has specific demands.
Fryers deserve a close look, too. If frying is part of your operation, make sure the fryer you’re getting has adequate oil capacity, a built-in filtration system if possible, and safety features like a high-limit thermostat. Grease fires are a real risk in any commercial kitchen, and you want every safeguard in place.
Also check that all equipment carries NSF certification and meets local health department standards. This will save you enormous headaches during inspections.
3. Ventilation System and Exhaust Hood
Here’s a feature that a lot of first-time buyers overlook until they’re sweating through service in a 120-degree trailer – ventilation.
A proper commercial exhaust hood isn’t optional. It’s code-required in almost every jurisdiction, and more importantly, it makes your kitchen actually functional. A hood that doesn’t move enough air turns your trailer into a miserable working environment and creates grease buildup that’s both a fire hazard and a cleaning nightmare.
Look for a Type I hood (for grease-laden vapor from cooking) positioned directly over your high-heat equipment. The CFM (cubic feet per minute) rating needs to match the BTU output of the equipment underneath it. Your trailer builder should be able to walk you through these calculations – if they can’t, that’s a red flag.
Equally important is the makeup air system. When your hood pulls air out of the trailer, fresh air needs to come in to replace it. Without a proper makeup air setup, you’ll create negative pressure that makes your equipment work harder and your exhaust hood perform poorly.
Some states also require fire suppression systems integrated into the hood – often Ansul systems or equivalent. Find out what your jurisdiction requires before you finalize the build, not after.
4. Power Supply and Electrical System
Power is one of the most critical – and most commonly misunderstood – aspects of a mobile kitchen trailer.
Start with the generator. If your trailer comes with one, pay close attention to its wattage output. Typical mobile kitchen trailers running a range, fryer, refrigeration units, hood, and lighting can easily demand 20,000 watts or more. An undersized generator means tripped breakers, fluctuating power, and equipment damage over time.
Diesel generators generally outperform gas models for sustained commercial use – they’re more fuel-efficient under load and tend to last longer. Make sure the generator mounts securely with proper vibration dampening, and that exhaust is routed away from the food preparation area and any intake vents.
Beyond the generator, look at the trailer’s internal electrical panel. It should be a commercial-grade panel with clearly labeled breakers for each circuit. You want dedicated circuits for high-draw equipment – your fryer, oven, and HVAC shouldn’t share circuits with your prep equipment and lighting.
Also ask whether the trailer can connect to shore power (external grid power). This is valuable when you’re operating at venues or commissary kitchens that offer hookups – it saves generator fuel and wear.
Check that all wiring meets NEC (National Electrical Code) standards, and that the build includes GFCI outlets in wet areas, which is required by code and simply smart practice.
Must Read: Mobile Kitchen Trailer: Setup, Design & Cost Guide
5. Plumbing and Water Systems
A mobile kitchen trailer needs to handle water independently, which means you’re dealing with fresh water storage, wastewater storage, and everything in between.
Fresh water tank capacity is your starting point. For a busy service day, you might go through 50 to 100 gallons of water or more depending on your menu and cleaning needs. Know your volume requirements before you commit to a tank size. Many operators find that 100 gallons is a reasonable minimum for a full-service mobile kitchen.
The water pump and pressure system need to deliver consistent pressure to all fixtures – typically 35 to 55 PSI for comfortable operation. Low pressure at the handwashing sink or the pot fill faucet slows everything down.
On the wastewater side, your gray water tank needs to hold at least 15% more capacity than your fresh water tank – this is often a health code requirement, and it makes practical sense because water volume grows slightly through use. Make sure your gray water system includes a proper dump valve and that you know where you’ll dispose of wastewater legally in each location you plan to operate.
Hot water is non-negotiable for commercial food service. Your water heater needs to reliably produce water at 110 to 120°F for handwashing and cleaning. For three-compartment sink sanitizing, you may need water at higher temperatures depending on your sanitation method. Some operations use chemical sanitizers at lower temps – know your local health department’s standards here.
Look for commercial-grade plumbing fixtures throughout – NSF-certified sinks, stainless steel faucets with gooseneck or swing spouts for flexibility, and a three-compartment sink if you’re washing dishes on-site.
6. Refrigeration and Cold Storage
Refrigeration in a mobile kitchen isn’t just about keeping things cold – it’s about keeping things cold consistently, even when the weather is fighting you.
Commercial refrigeration units built for mobile use are designed to handle temperature swings and vibration that standard restaurant equipment would struggle with. This matters a lot. A residential or light-commercial unit in a mobile kitchen will cycle on and off constantly in summer heat, struggle to maintain safe temps, and wear out prematurely.
Think through your cold storage needs carefully. Do you need reach-in refrigerators? Under-counter units to save floor space? A dedicated freezer? A refrigerated prep table for sandwich or salad assembly? Most operations need a combination.
Temperature recovery time is an important spec to ask about. When you open the door repeatedly during a busy lunch rush, how fast does the unit return to safe temperature? A quality commercial unit handles this well. A cheap one doesn’t.
Also look at the condenser coils and their placement. Condensers need airflow to work efficiently. In a tightly packed trailer, poor condenser placement leads to units running hot and inefficient. Ask the builder how they’ve addressed this in the design.
Don’t overlook the thermometer situation either. Digital thermometers with continuous logging are invaluable for health inspections and HACCP compliance. Some modern units include them built-in; others need them added.
7. Health and Safety Compliance Features
You can build the most beautiful mobile kitchen in the world, but if it doesn’t pass inspection, you’re not going anywhere.
Health codes vary significantly by state and even by county or city, so your first step is to research the specific requirements in every jurisdiction where you plan to operate. That said, there are common features that virtually every health department looks for.
A three-compartment sink for washing, rinsing, and sanitizing is standard. Separate handwashing sinks – positioned so they don’t require you to reach over food to use them – are required in most places. Adequate refrigeration capacity and documented temperature control are universal requirements.
Non-porous, cleanable surfaces everywhere are a must. That means no bare wood, no unsealed grout lines, no surfaces that absorb grease or moisture. Stainless steel and commercial-grade FRP (fiberglass reinforced plastic) wall panels are common choices.
Adequate lighting matters more than people realize. Health inspectors check lighting levels – you typically need at least 50 foot-candles at food prep surfaces and equipment – and poor lighting also makes your kitchen less safe and less efficient to work in.
Fire suppression and extinguisher requirements vary, but you should assume you’ll need a proper suppression system over cooking equipment and appropriate portable extinguishers. Build this in from the start rather than trying to retrofit later.
Finally, ask about commissary kitchen requirements in your area. Many jurisdictions require mobile food operations to have a licensed commissary kitchen where they prep food and clean equipment. Your trailer needs to work in partnership with that commissary setup.
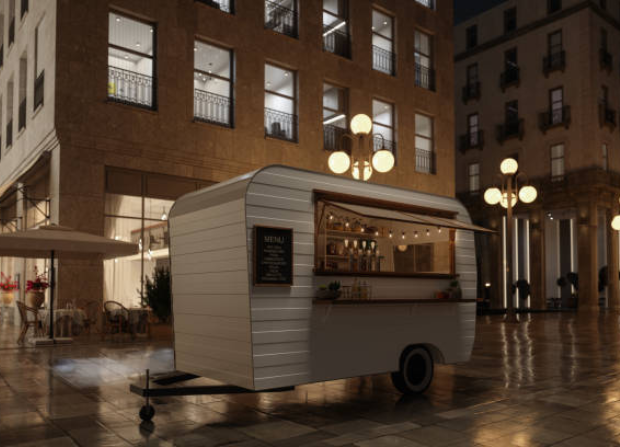
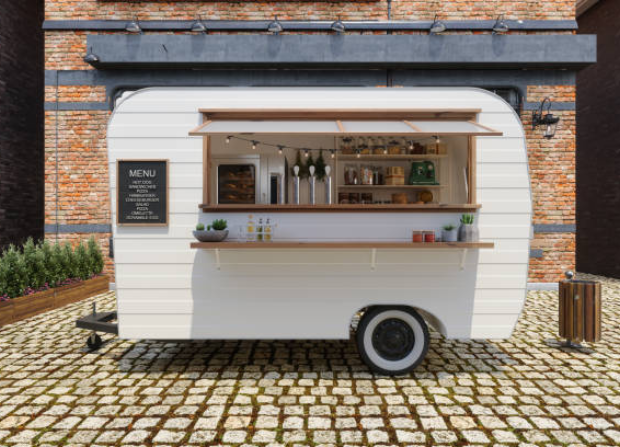
8. Exterior Build Quality and Trailer Construction
The kitchen inside matters, but so does the shell that carries it.
Start with the trailer frame. Heavy-gauge steel construction is the standard for commercial trailers – it handles the weight of commercial equipment, the stress of road travel, and the wear of daily use. Ask about the frame gauge and the welding quality. Cheap construction here leads to structural problems over time.
The axle and suspension setup needs to match the loaded weight of your trailer. Overloaded axles wear faster, handle poorly, and can be a roadway safety issue. Make sure your trailer is rated for its actual loaded weight – factor in equipment, water, propane, supplies, and staff if applicable.
Exterior cladding materials affect both durability and appearance. Aluminum siding is lightweight and rust-resistant. Stainless steel exterior panels are more durable but heavier and more expensive. Fiberglass composite panels offer good durability and can be finished in any color or design.
Roof quality deserves attention. A well-insulated roof keeps your interior cooler in summer and warmer in winter, reducing the load on your HVAC and making the workspace more comfortable. Look for proper sealing around any roof penetrations – vents, exhaust stacks, wiring – because leaks here cause serious damage to equipment and walls.
Wheel well covers and undercarriage protection guard against road debris, moisture, and corrosion. This is basic trailer care that good builders include from the start.
9. Climate Control and Insulation
Working in a mobile kitchen is physically demanding. Add extreme heat or cold to the equation and it becomes genuinely dangerous. Good climate control isn’t a luxury – it’s a safety and productivity feature.
Insulation quality starts with the walls and roof. Closed-cell spray foam insulation offers excellent R-value and also acts as a moisture barrier, which is important in a kitchen environment. Rigid foam board is another common option. Whatever insulation the builder uses, ask for the R-value rating – you want at least R-13 for walls and R-19 for the ceiling as a baseline.
For cooling, a dedicated commercial HVAC unit sized for the trailer’s interior volume is the right solution. A window AC unit bolted on as an afterthought won’t cut it in a commercial kitchen producing significant heat from cooking equipment. Look for a self-contained unit designed for mobile or marine applications – they handle the vibration and movement of travel better than residential equipment.
Heating matters too, especially if you operate in regions with cold winters. Some operations run propane-powered heating; others integrate it into their HVAC system. Make sure whatever heating solution you choose is safe for use in an enclosed space with proper ventilation.
Ventilation beyond the cooking hood is worth thinking about. Fresh air intake ventilation helps with staff comfort and helps manage humidity in the space. High humidity in a kitchen leads to condensation, mold risk, and unpleasant working conditions.
10. Propane and Fuel Systems
Most mobile kitchen trailers run cooking equipment on propane, and how that system is designed and installed matters enormously.
Start with propane tank capacity. Standard 100-pound tanks are common, but a busy operation may burn through one during a full day of service. Many operators run dual tanks with an automatic changeover valve – when one tank empties, the system switches to the second without interrupting service. This is worth the small additional cost.
Tank placement needs to meet NFPA 58 (the propane code) requirements for distance from openings, ventilation, and secure mounting. Your tanks should be in a properly vented exterior compartment that’s accessible for exchange but protected from accidental impact.
The regulator system controls the pressure that reaches your cooking equipment. A two-stage regulator – one stage at the tank, one at the equipment – delivers more consistent pressure than a single-stage setup, which matters for equipment performance and safety.
Gas lines throughout the trailer should be properly sized for the BTU demand of the equipment they serve, made from approved materials, and tested for leaks. A reputable builder pressure-tests the entire system before delivery. Ask to see documentation of this.
Propane detectors inside the trailer give you early warning of any leaks – these should be included as a standard safety feature, not an add-on. Automatic shut-off valves at the tank are another layer of protection worth having.
Putting It All Together
A mobile kitchen trailer is a serious investment – we’re talking anywhere from $50,000 on the low end to $200,000 or more for a fully custom, high-capacity build. That’s too much money and too important a business asset to approach casually.
Use this list as your framework. When you’re evaluating trailer builders or touring used trailers, ask direct questions about every one of these ten features. Push for specifics – brand names, model numbers, specs, certifications. A builder who’s confident in their work will give you straight answers. One who deflects or gets vague on details is telling you something important.
And before you finalize anything, do your regulatory homework. Know what your state, county, and city require. Know where you plan to operate and what permits those locations demand. Build your trailer to meet the most stringent standards you’ll encounter – it’s much easier to pass a tough inspection than to retrofit a trailer that barely meets minimum requirements.
The right mobile kitchen trailer becomes a genuine business asset – a platform that lets you do your best work wherever opportunity takes you. Invest the time upfront to get it right, and it will pay you back for years.
About Author:

Leave a Reply